Solve Error Executing Updater Binary In Zip using three simple methods. Fix updater process ended with Status 7 Error through TWRP recovery. Since Android is open-source, it is possible to edit the code, recompile, and re-release it for different types of devices. You can easily tweak the kernel, theme, recovery, or user interface from the Operating system.
Many third-party developers compile various custom ROMs and kernels to experience a change in the appearance and performance of a device. A brand-new Android device comes with preinstalled stock firmware. This stock ROM has limited functionality; however, you can improve it by flashing a custom ROM.
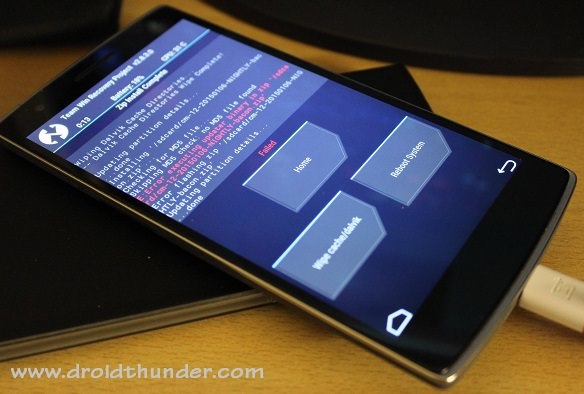
This way you can not only gain some extra features but also improve your device performance. But flashing any custom firmware is a risky process. A small mistake during installation can brick your Android device, thus making it completely useless. For flashing any custom ROM or kernel, you must have a custom recovery installed on your device.
ClockworkMod (CWM) and Team Win Recovery Project (TWRP) are the most popular custom recoveries. Both of these recoveries come loaded with features and are useful for installing third-party ROM or even stock Android images. However, replacing the stock recovery with a custom voids your device warranty.
Related: How to Solve Status 7 Error in TWRP Recovery
Sometimes while installing a zip file through recovery, an unexpected or unwanted error might occur, thus failing the flashing process. At such times, it becomes really difficult as you cannot restart your device because of wiped partitions. The only way to get out of this situation is to restore your previously backed-up ROM or to flash any working ROM.
But what if you don’t have any custom ROM or backup ROM? Don’t worry, as we will guide you through our tutorial on how to fix errors executing updater binary in zip. Without wasting any more time, let’s get started.
How to Fix Error Executing Updater Binary In Zip
When installing certain custom ROMs, you can encounter errors like Status 7 Error, Error: 7 or zip signature verification failed, Error Executing Updater Binary in Zip, and many more. Generally, these errors are caused due to the updater-script file, which is present in your custom ROM. This file confirms your Android device model to check the compatibility with the ROM.
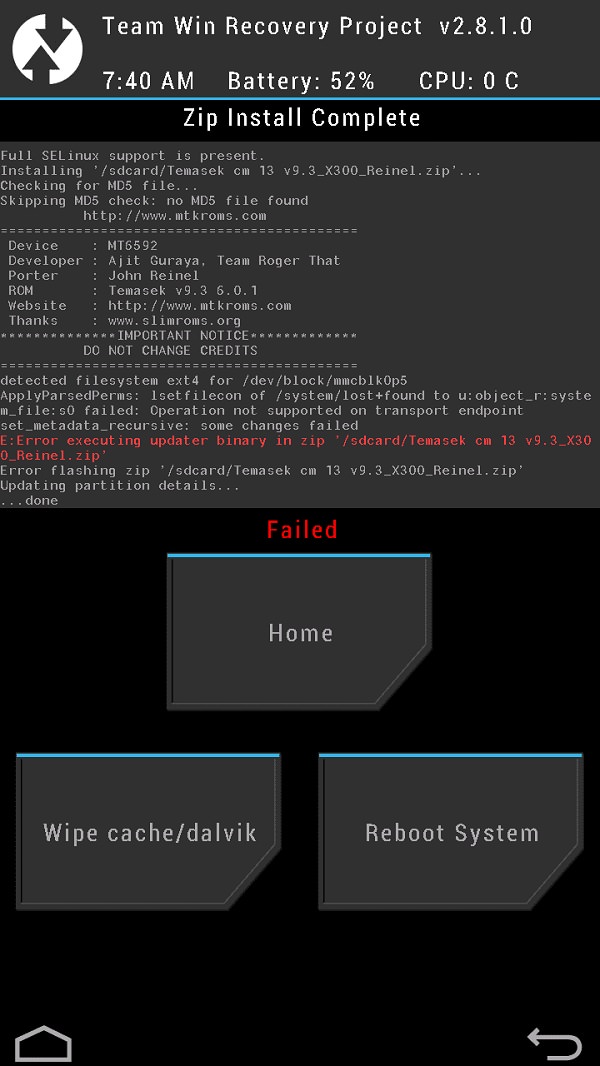
This is a safety mechanism to prevent the flashing of incompatible ROMs on your device. But sometimes, you may encounter these errors even if you have the correct ROM for your device. The reason for this is a code error in the updater script created by the developer while compiling the ROM zip file. The solution to this problem is quite simple, but still, many users get stuck when they encounter such errors.
Related: How to Fix TWRP Error 70 while installing GApps
You can fix these common errors by using our easy step-by-step tutorial given below. To fix this issue, all you need is a computer and software. That’s it! You can even use your Android device if you don’t have a PC. Here in this guide to fix error executing updater binary in zip errors, we have listed three methods. Refer to any one of the three methods to solve the error executing updater binary in zip error.
Disclaimer
Proceed at your own risk. Implement every step correctly without doing anything on your own. If your device gets bricked by following this guide, then we at Droid Thunder will not be held responsible for that.
Method 1: By Editing Updater-Script file
In this method, we’ll edit and update the Updater-Script file present in the zip package file. Let’s get straight into it.
Downloads
Steps to Fix Error Executing Updater Binary In Zip
- Download and install WinRar and Notepad++ on your computer.
- Copy the ROM zip file on your computer and extract it using WinRar.
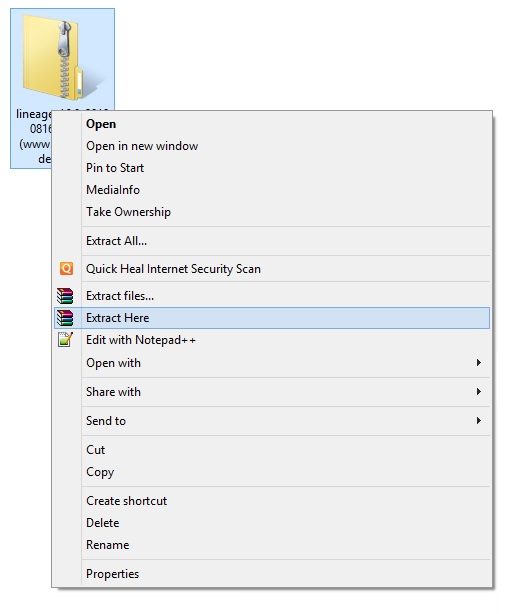
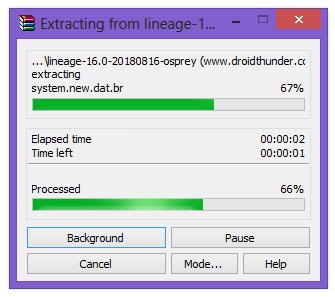
- After extracting, you’ll find Install, META-INF, and System folders along with other files.
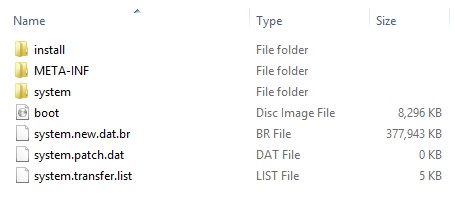
- Note: Files may differ from those shown in the image.
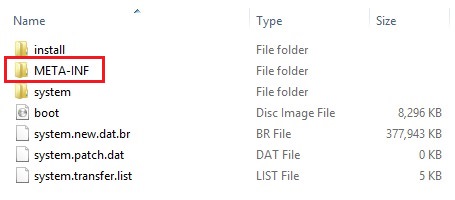
- Open the META-IN folder.
- Then open the com folder.

- Next, open the google folder.

- Finally, open the android folder.

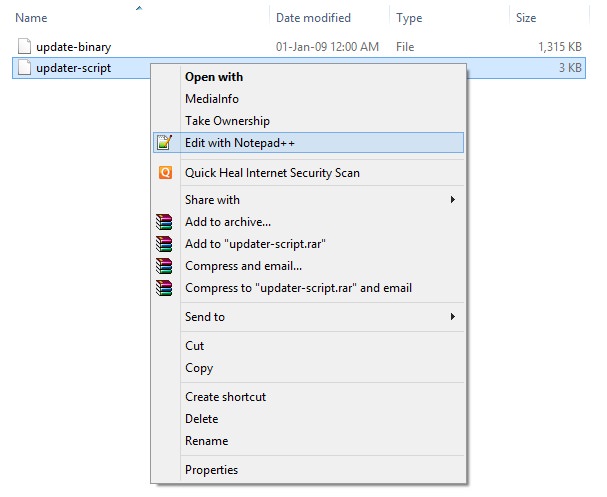
- Here, you’ll find these two files: update-binary and updater-script.

- Right-mouse click on the updater-script file and select Edit with Notepad++ option.
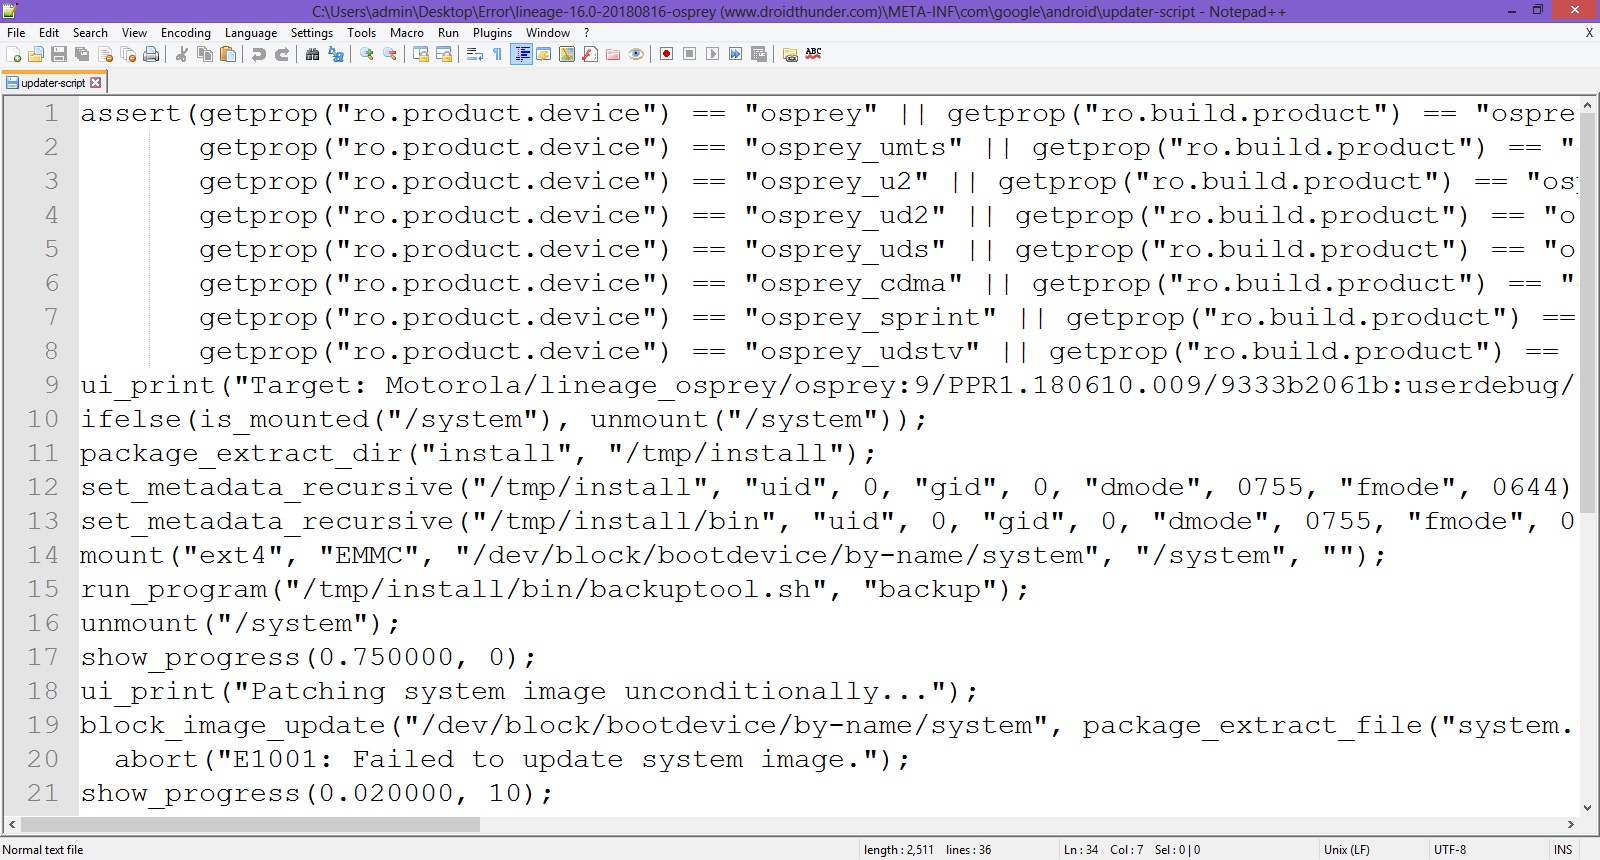
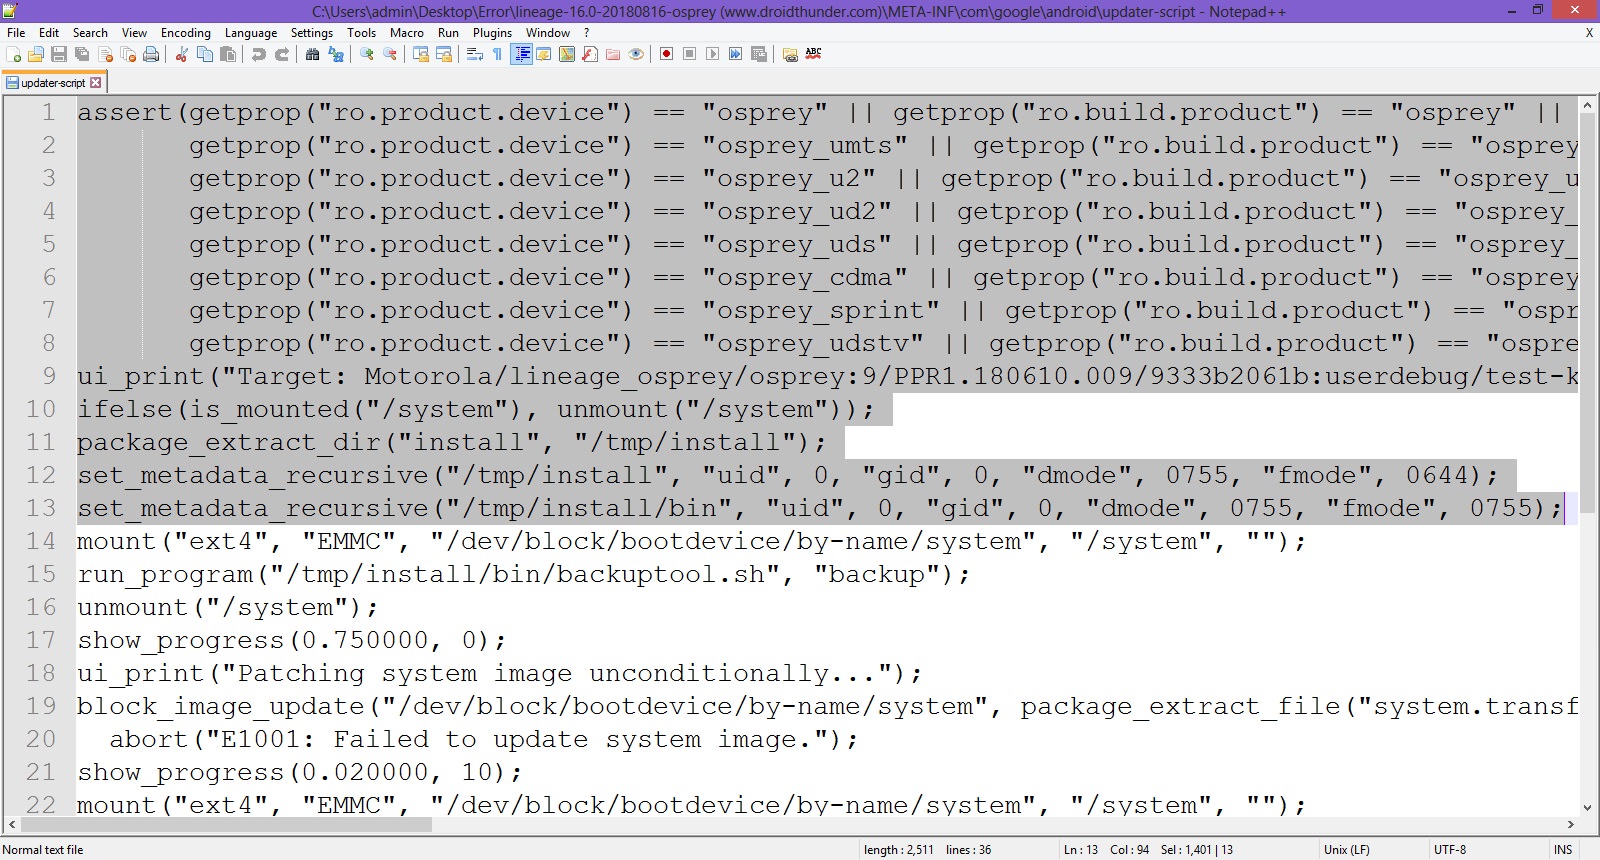
- Select the line starting with ‘assert’ to the next semi-colon and delete it.
- Normally this is the first line or one of the first lines at the top of the text file.
- Remove everything until the command ‘mount’ is visible.
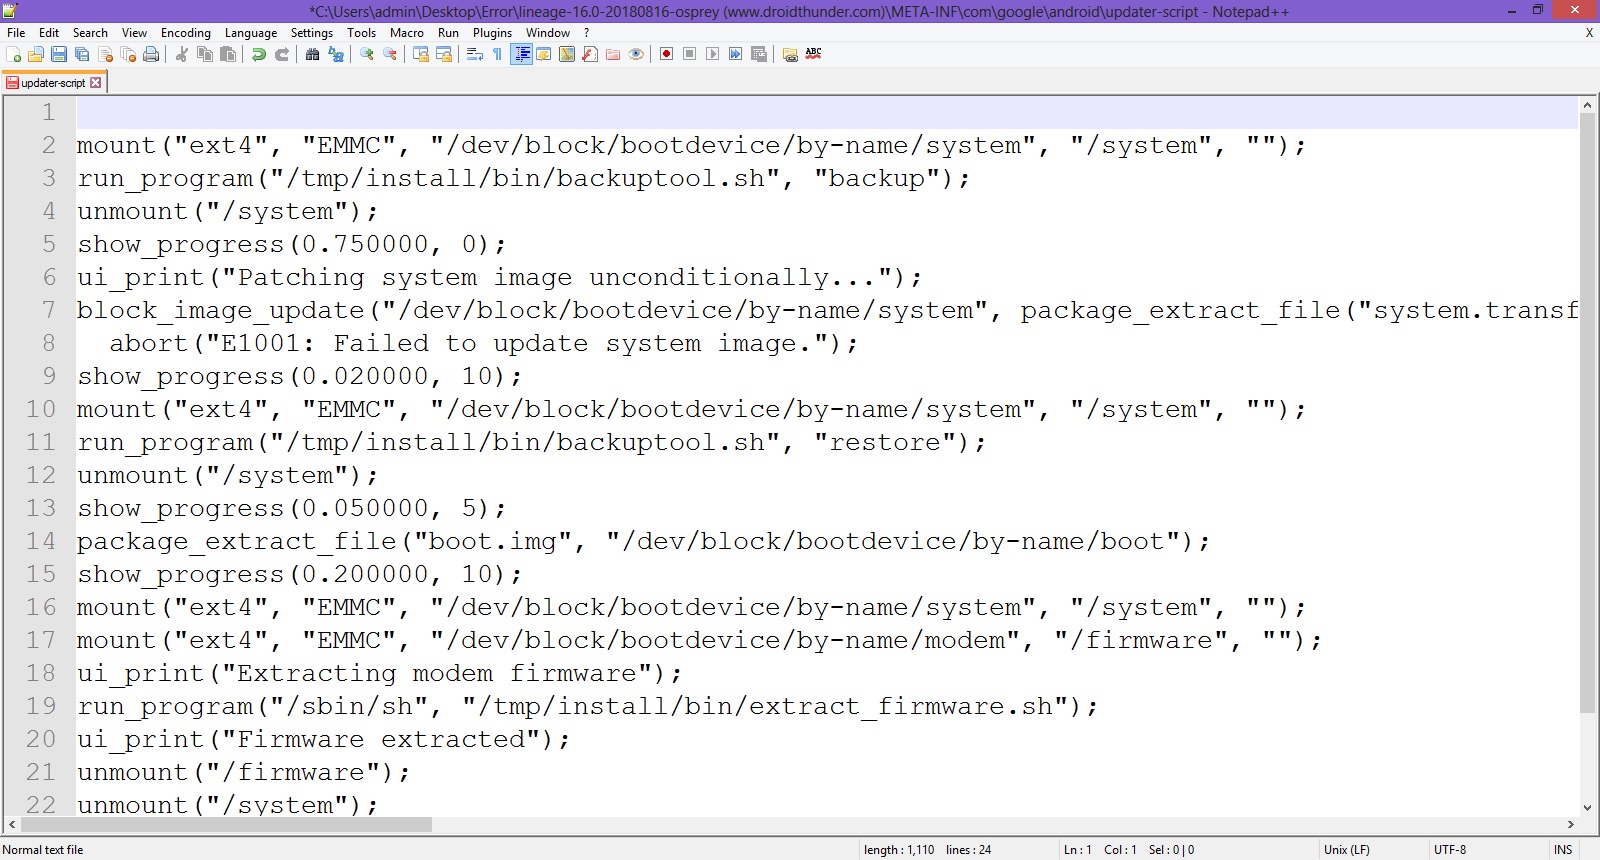
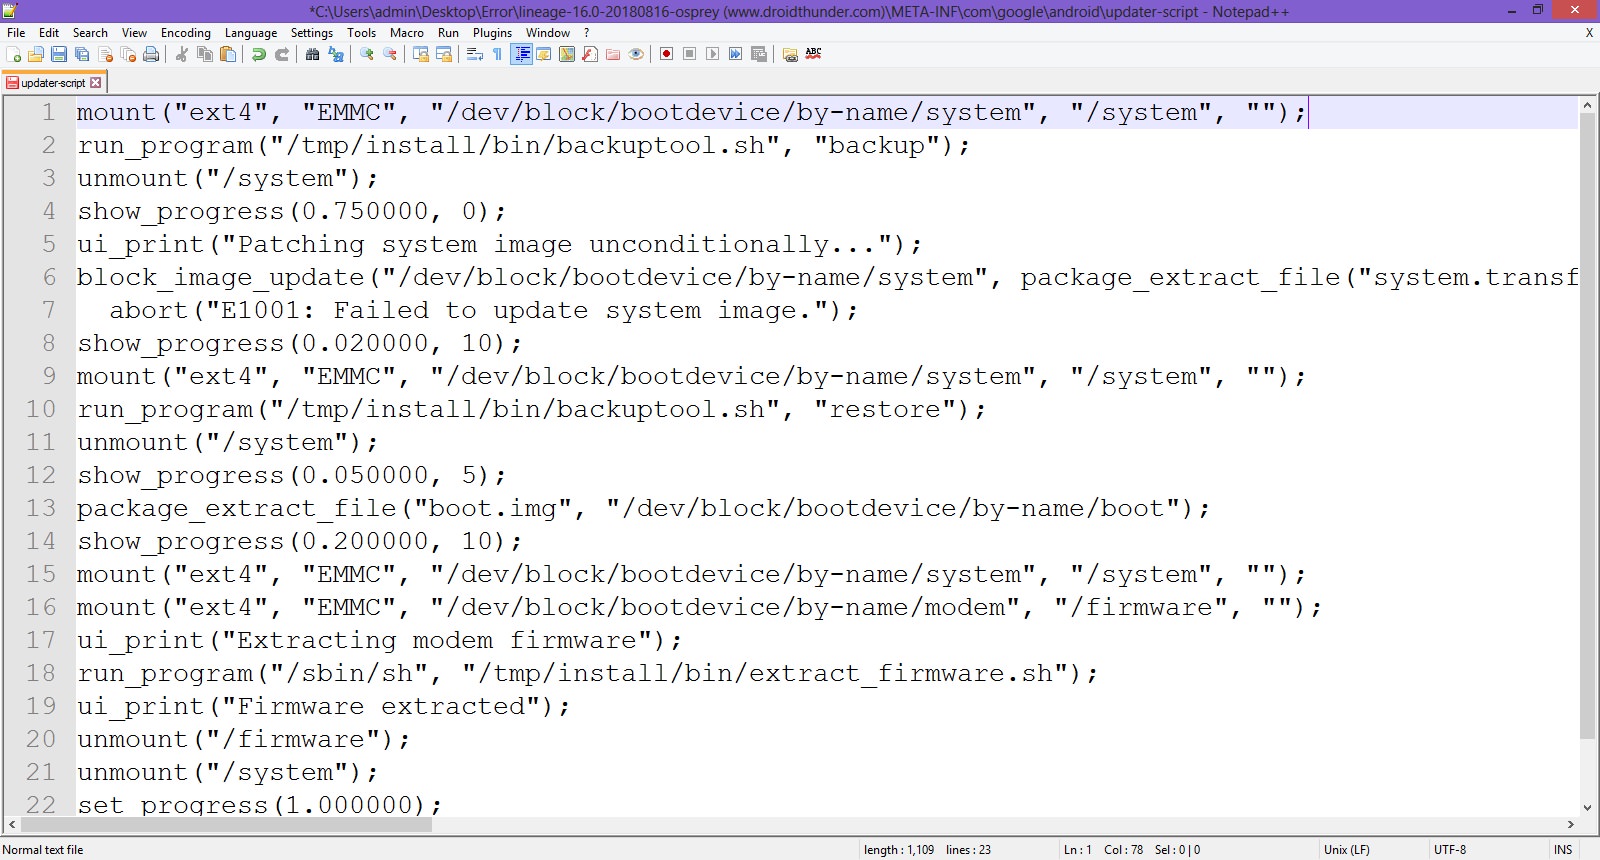
- Now your first line will start from mount. Save the file.
- Rezip/Re-compress all the files you’ve unzipped.
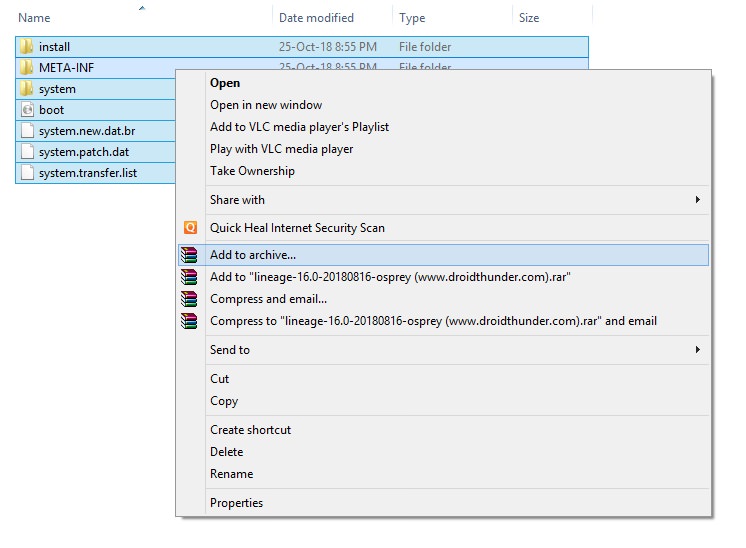
- Note: Save it as a .zip file and NOT .rar.
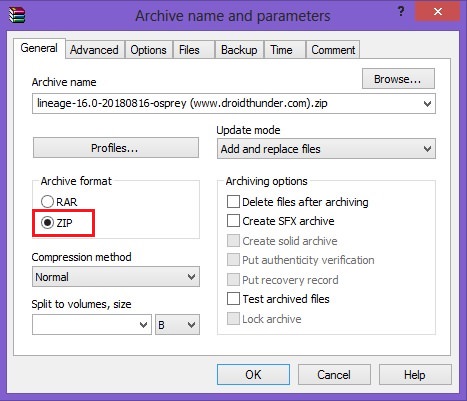
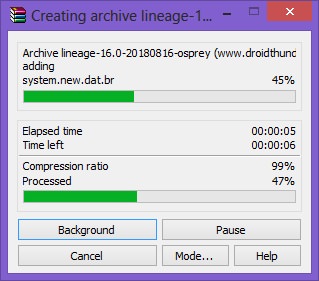
- Now copy this ROM.zip file on your device. And flash it through TWRP recovery. Now the ROM will be installed successfully without giving Error Executing Updater Binary In Zip error.
Method 2: By using Flashify app
We’ll use the Flashify app and install the latest TWRP custom recovery in this second method.
Downloads
Steps to Fix Error Executing Updater Binary In Zip
- Install the Flashify app from the Google Play Store.

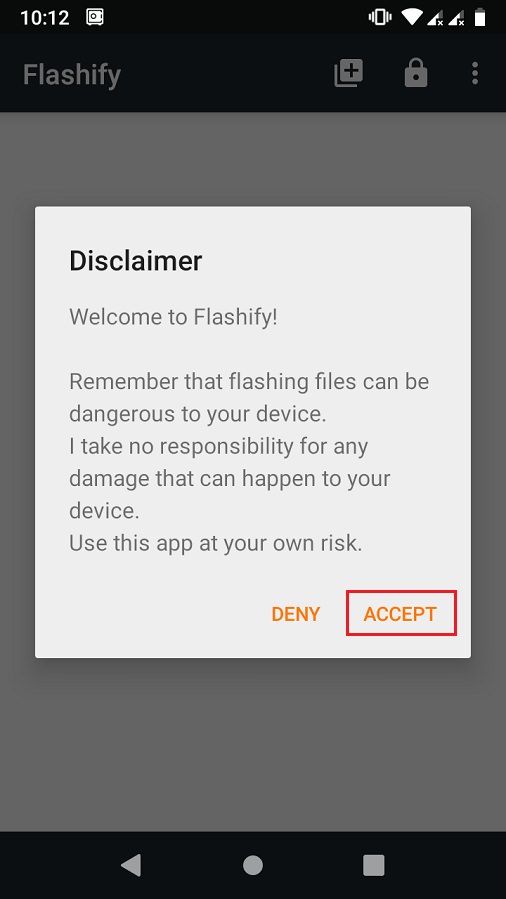
- Launch the app and give root permissions to the app.
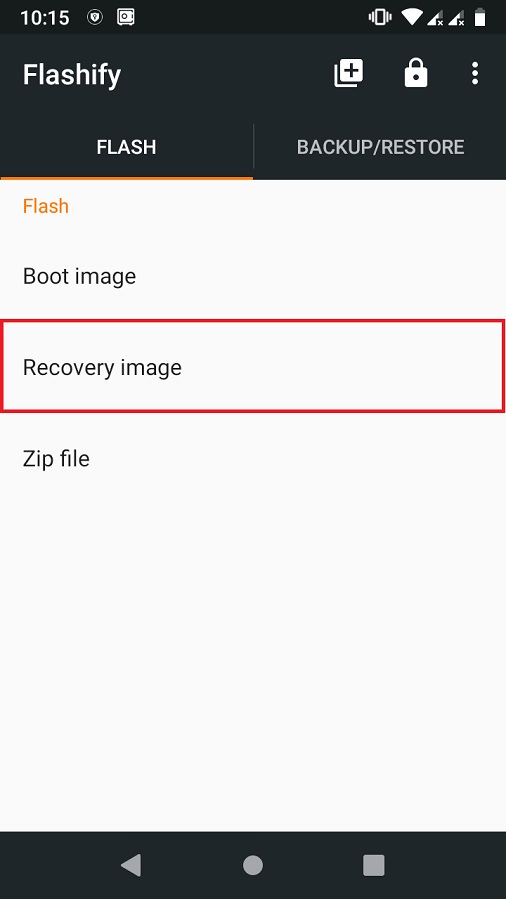
- From the Flash tab, select the Recovery image option.
- Then click on the Download TWRP option.
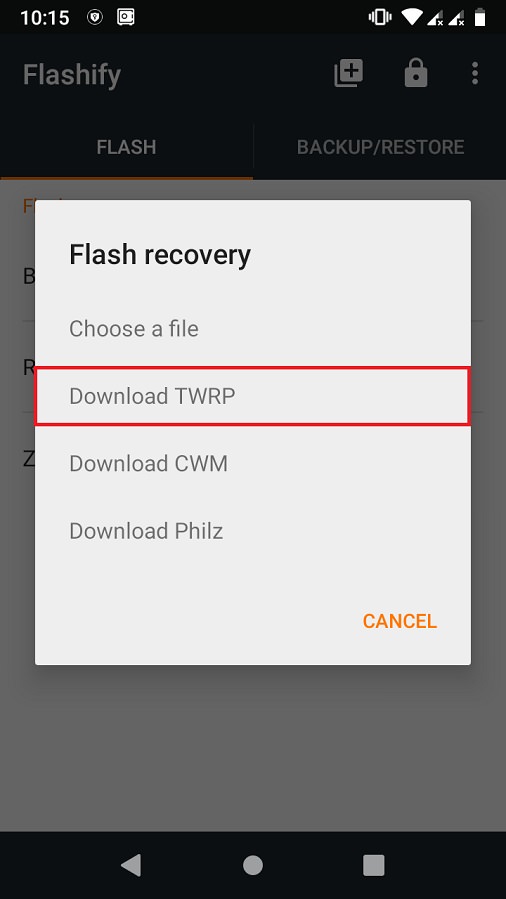
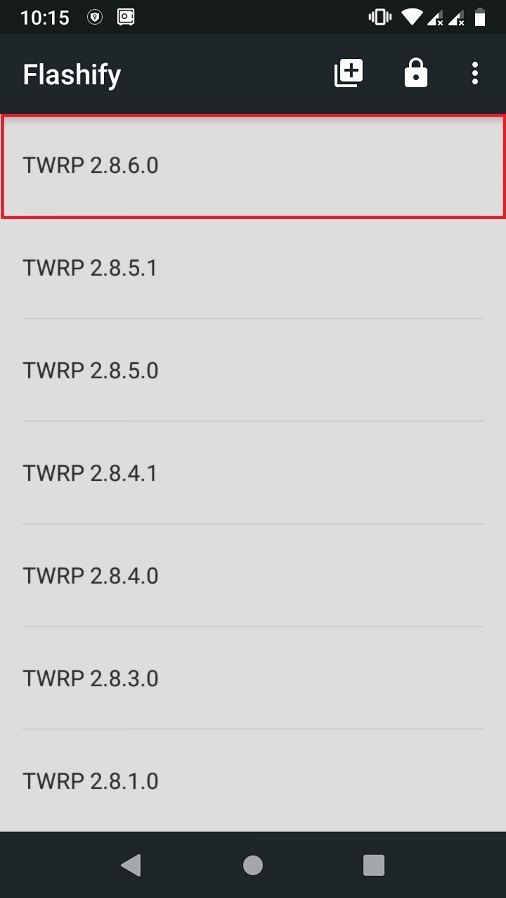
- A list of TWRP recoveries will be shown. Just choose the latest one.
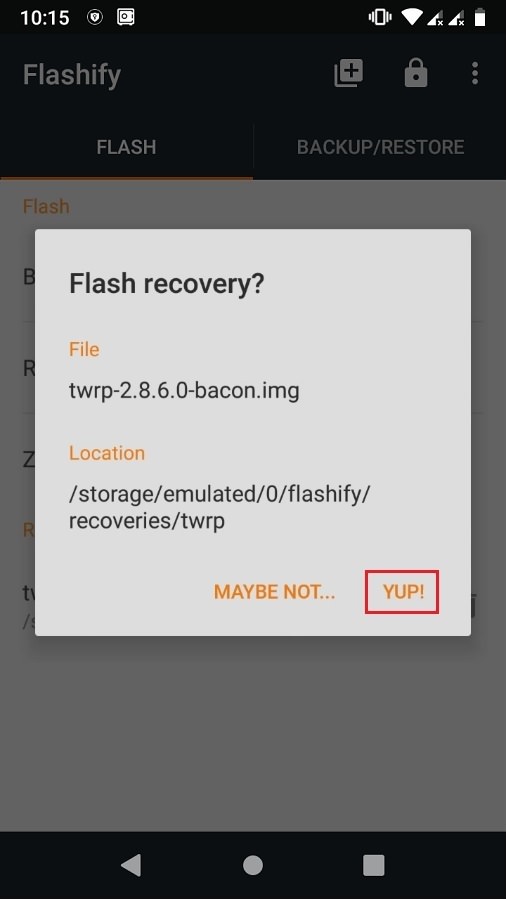
- Click on Yup to initiate the flashing of the latest TWRP recovery on your Android device.
- After the installation completes, boot into TWRP and flash the ROM.zip file. This time the zip file will be installed successfully without giving Error Executing Updater Binary In Zip error.
Method 3: Factory Reset
In this method, we’ll use TWRP recovery to perform a factory reset and wipe the Dalvik cache. Let’s get straight into it.
Steps to Fix Error Executing Updater Binary In Zip
- Boot your Android device into TWRP recovery.
- Click on the Wipe option.
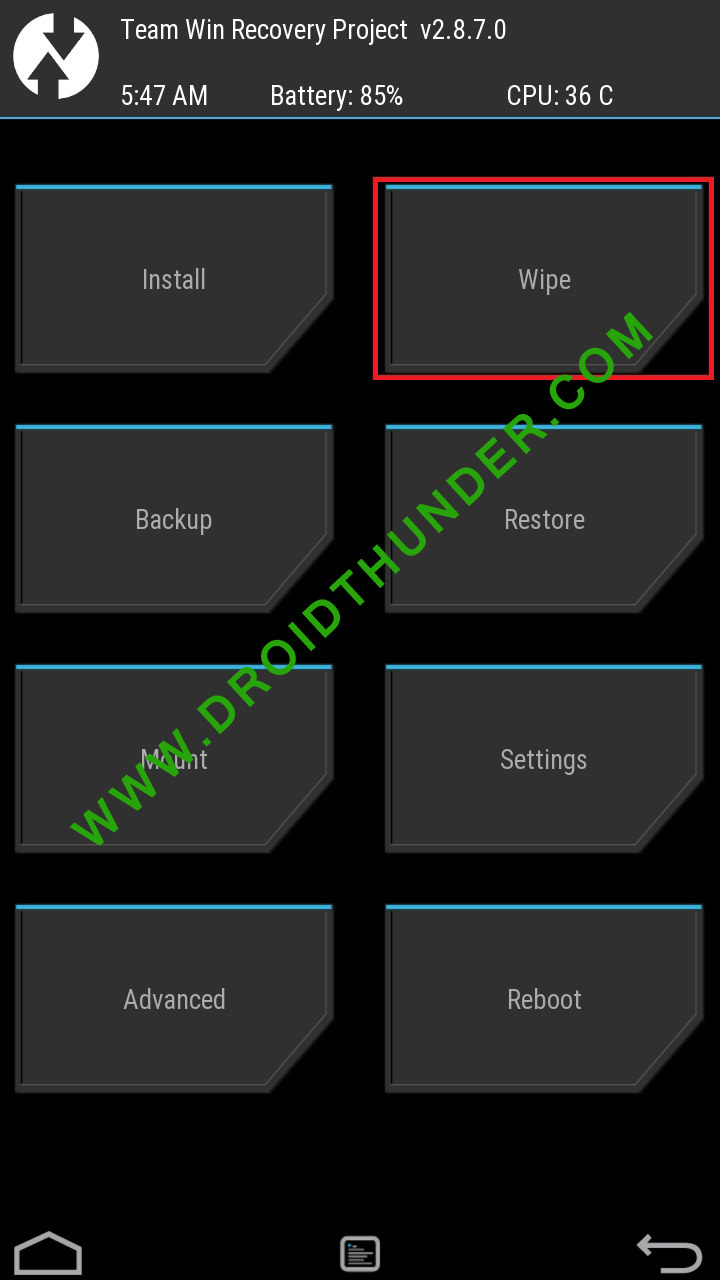
- Then swipe right to start the factory reset process.
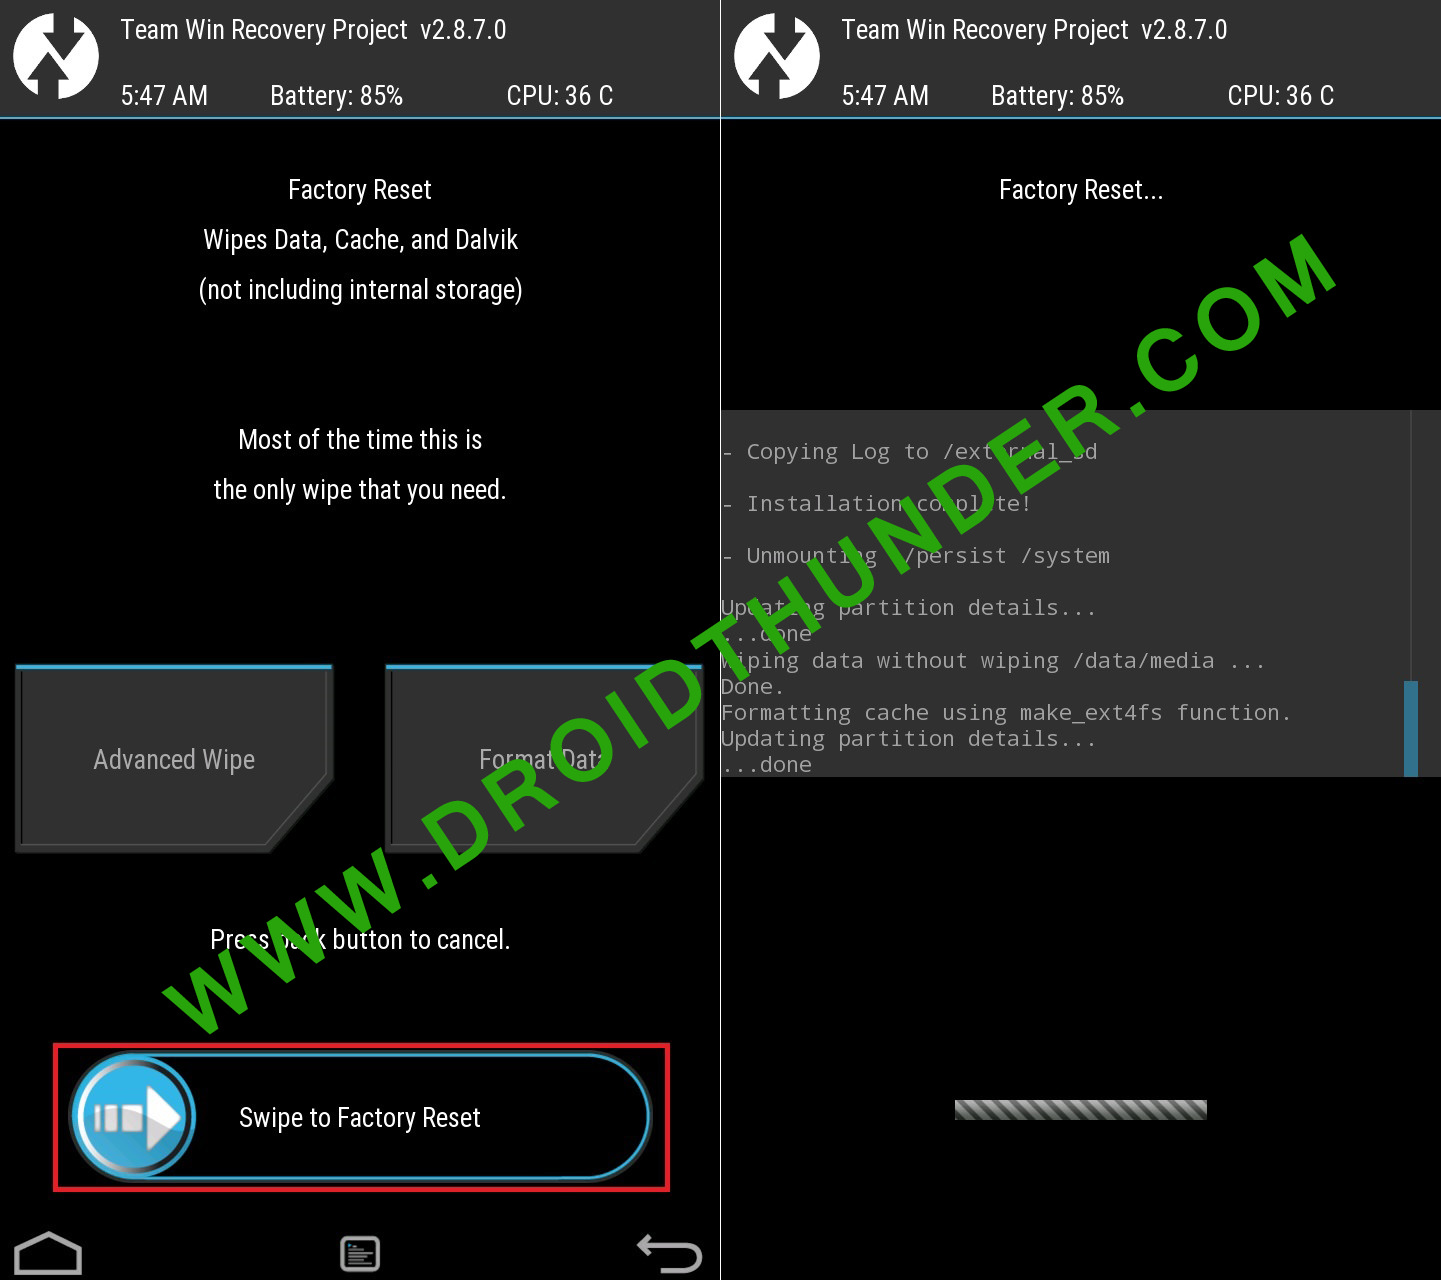
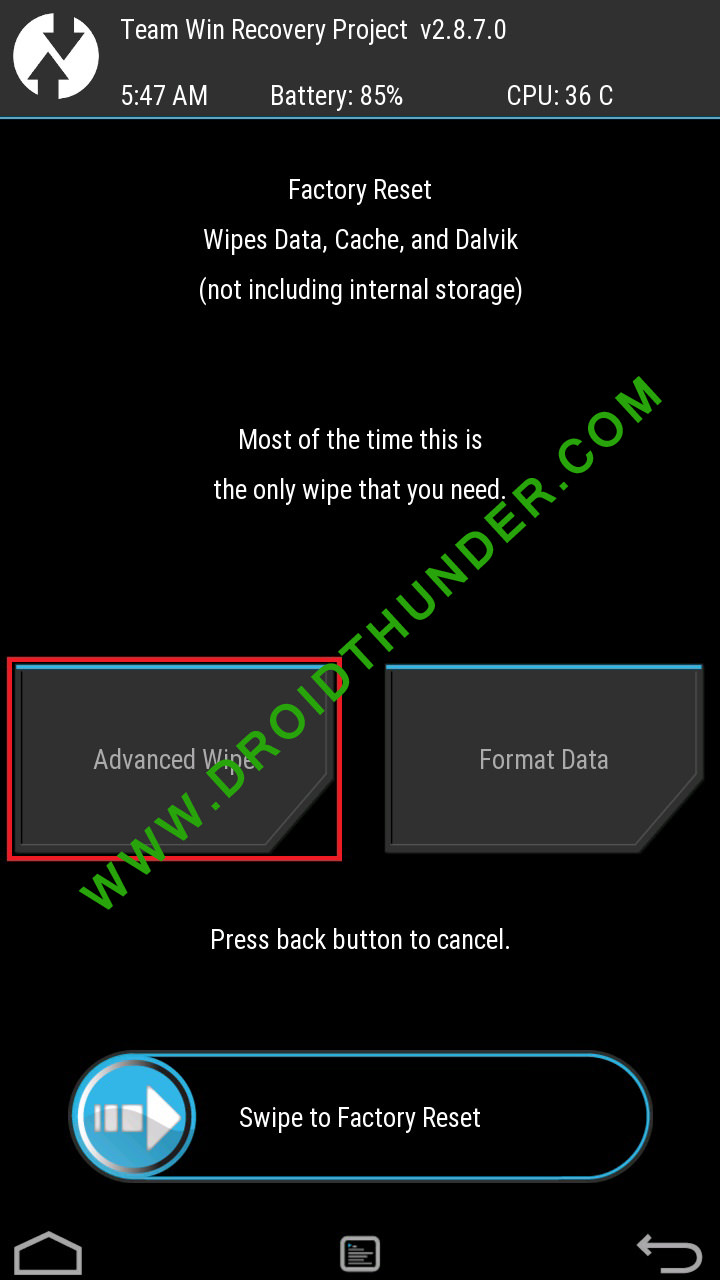
- After factory resetting your device, again select the Wipe option. And then, click on the Advanced Wipe option.
- On the next screen, select only the Dalvik cache partition.
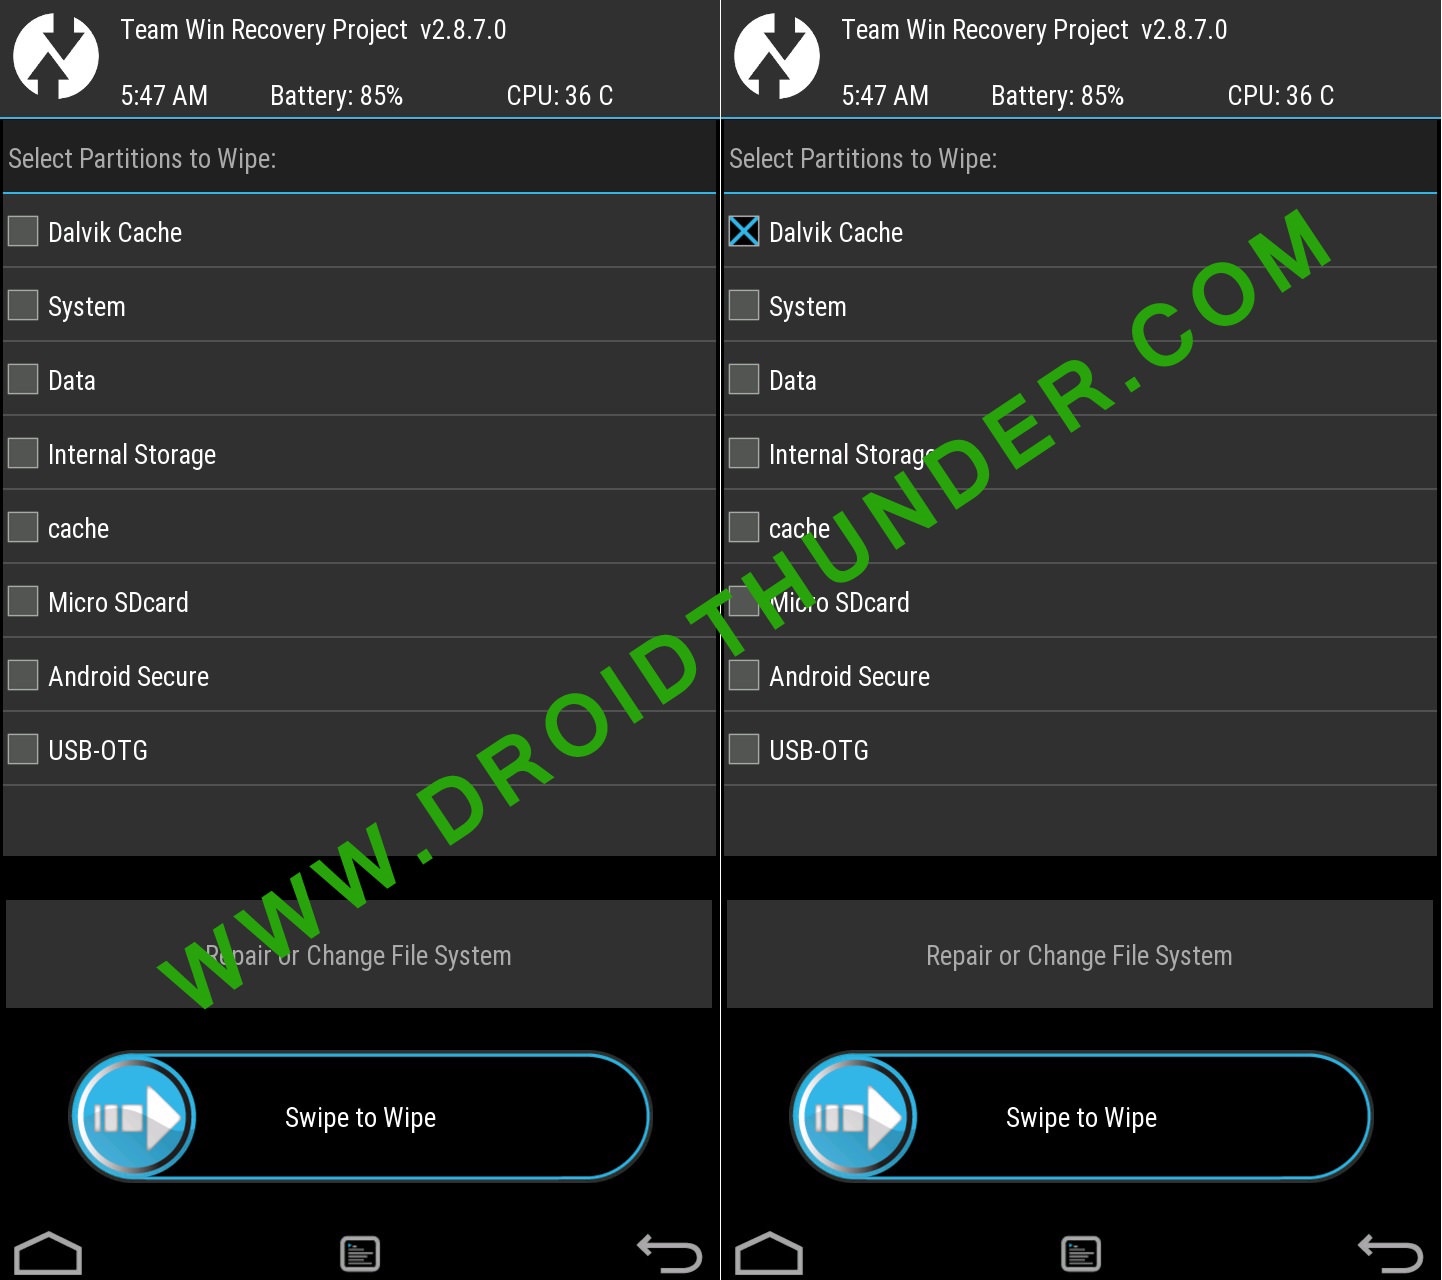
- Note: Do NOT select system and data partitions.
- Then swipe right to initiate the wiping process.
- After the wiping completes, flash the ROM.zip file, and it’ll be installed without giving an Error Executing Updater Binary In Zip error.
Conclusion
Finally! This is how you can solve Error Executing Updater Binary In Zip in TWRP while flashing custom ROM. If the above methods don’t work, please comment below.





47 thoughts on “How to Solve Error Executing Updater Binary In Zip”
1ST METHOD IS WORKING FINE..
THANK YOU BRO…
Welcome 🙂
its work. Thank you sir.
Welcome 🙂
Thanks,it seems to work like a charm. Accidentally formatted the entire phone and nothing seemed to help. Keeping this article incase I’ll need it for future use. Currently waiting for the initial (long) start of LineageOS 16, but there’s the logo so that’s already a good sign
Glad to hear that! 🙂
Abhijeet…. You are a LEGEND!!!!!!! Thank you sooooooo much! Keep up the good work!!!
Thanks for the kind words Jaydee! 🙂
Thanks mate! What a annoying issue
Many thanks!
Several days I tried installing LineageOS 16 (unofficial) to a Samsung A5 (SM-A500FU) but it failed hopelessly… Until I discovered your post!
The 1st did the trick (didn’t try the others though).
Now I have a phone running on Android 9 – the stock version stopped at 6.0.1.
Again: thanks!
Happy for you! 🙂
Thank u so much bro. it worked as a charm
now i have pixel launcher with android pie
Happy for you 🙂
After a long suffering period, installing lineage OS finally worked on my Samsung Galaxy S5. With method 2 and 3, i was not successful, but with method 1. Thank you very much for this helpful instruction.
Glad! 🙂
it says E:zip signature verification failed:1
Which method did you use?
Method 1 as well as method 3
May I know what are you trying to flash?
I’m trying to flash lenovo K3 note.
Try with this TWRP recovery.
Hey sorry to disturb but I noticed in super su app that currently I haven’t checkmarked the “enable su during boot” option. Is that why I’m getting error?
No problem dude. Generally, this error occurs due to the updater-script file which is present in your file. Maybe the downloaded file is not compatible with your device. Just update the TWRP recovery and try again. Let me know if the problem persists.
Hey I installed twrp from your link by installing it and selecting recovery option and I again rebooted into recovery. I allowed modifications too and then I followed method 3 but it taking a long time to perform factory reset. It’s still going. I’m worried what do I do?
Don’t worry Aravindh. Are you sure you are flashing the correct package file?
Hey it finally completed the format and I tried again method 3 but same error. Zip signature verification failed.
Tell me the file name and its source
Okay. So are you now using the TWRP v3.1.1-0 that I’ve mentioned earlier? If yes, then I request you to download the LineageOS again, and follow only Method 1 from the above guide. Sometimes, the error might occur due to incomplete downloads as well.
Okay I’ll try that and get back to soon. Thank you for your help!
You’re welcome!
I’m using twrp 2.8.7
Hey I’m really sorry to bother you but I tried other ROM Aospextended for K3 note(k50a40_S327_160517_ROW) with aio_otfp board.
but I’m getting that same error zip file verification failed. I don’t know what I’m doing wrong. If you could help me figure this out I’ll be really grateful. Thanks!
No issues Aravindh. I’ll check the package file and get back to you.
It seems there is no issue with the ROM package file. The only solution is update TWRP to the latest one.
Hey one more thing. I’m trying to install twrp 3.4.0 (latest) and I selected lenovo but my exact model isn’t available. Closest thing is A7000 aio_row but cpuz tells me that my board is aio_otfp. Is that ok or?
Nope, don’t flash that. Have you tried with CWM? I think K3 Note does have a CWM recovery.
So now to do cwm, how do I remove twrp? Could you please point to any article that helps? Thank you very much
Refer: Link
None of the methods worked for me……..its still showing the same error…. when i try the first method the binary error was not there instead it showed error flashing zip…..can you please help me….. maybe i ve downloaded the wrong rom…..can u provide me a link to download the correct rom and TWRP???
My device is
Samsung galaxy tab 3, 7.0 inch
SM-T211
Thank you
Refer:
Download Link: TWRP for SM-T211
TWRP Installation Guide
Custom ROM from XDA forum
In method 1:
My updater script didnt start with assert..
What should i do??
No problem, just delete everything until the command ‘mount’ is visible.
3rd method worked for me. Thanks
Finally, a well written article that works. Thanks Mr. Abhijeet
Thank you
Completely fixed everything. Thanks guys, I’m so thrilled to finally have my first phone that has a custom ROM on it. So again, thanks.
You are welcome, Heather!