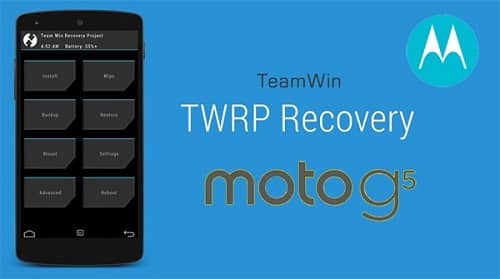
Root and install the latest TWRP v3.1.1-0 recovery on Moto G5 (Cedric) smartphone. Motorola’s G series has become the best selling smartphone ever and with the new Moto G5, the manufacturers have definitely kicked things up a notch. Launched in February 2017, Moto G5 comes with more premium, metallic design and an impressive host of extras that you wouldn’t usually expect to find in a device this cheap.
It also runs the latest version of Android 7.0 Nougat and is powered by 1.4GHz Octa-core Qualcomm Snapdragon 430 processor. More of its specs include 5.0 inches touchscreen display with a 1080 x 1920 pixels of resolution, 3 GB of RAM, and 16 GB of internal storage (expandable up to 128GB via a micro SD card), a 13-megapixel primary camera on the rear and a 5-megapixel front shooter for selfies.
So overall Moto G5 is an absolutely great device with some amazing specs and features. But with rooting you can surely make this device better. By rooting and flashing custom recoveries like Clockworkmod (CWM) or TWRP, you’ll not only be able to gain system access on the phone but also do a whole lot of customization.

How to Root & Install TWRP on Moto G5
In this article, we’ll discuss some easy steps on how to root and install the latest TWRP v3.1.1-0 recovery on Motorola Moto G5 (Cedric) smartphone.
Disclaimer
If your Moto G5 doesn’t function after performing steps given this article, whole responsibility will be yours. We should not be held liable for any damage caused to your device. Although the chances of bricking your phone are least. But still, this is a fair warning to you.
Compatibility
This guide is only for Motorola Moto G5 (Cedric). Do not try to implement this process on any other device or variant as it may increase the chances of damaging your phone permanently.
Downloads
Pre-Requisites
- Rooting will void your phone’s warranty. But if you want to regain it back then you can do that by un-rooting your Moto G5.
- It is recommended to charge your Moto G5 up to 60% so that there won’t be any interruption.
- Backup your contacts, apps, messages, notes, call logs, etc. for safety.
- Install Motorola mobile-specific USB drivers on your computer.
- Besides, unlock the bootloader of your Moto G5.
- Enable the USB Debugging mode on your device.
- Also, enable the OEM Unlock mode from the developer options.
Steps to Install latest TWRP v3.1.1-0 on Moto G5
- On your computer, download and install the ADB and Fastboot setup.
- Also, download the TWRP file on your computer. Copy this .img file to the location C:\Program Files\Minimal ADB and Fastboot folder (where you’ve installed the ADB and Fastboot).
- Using the USB cable connect your Moto G5 to the computer.
- Then go to the C:\Program Files\Minimal ADB and Fastboot folder, hold the Shift button and right mouse click on an empty space.
- You’ll see a list of options from which select Open command window here option.
- This will launch the command prompt window on your computer.
- Now to ensure that your phone is successfully connected to your computer or not, type the following commands in the command window and press enter:
adb devices
- As soon as you press enter key, you’ll see a message saying ‘List of devices attached’ along with some random numbers.
- This will confirm that your Moto G5 has properly connected to your PC.
- If such a thing doesn’t happen, then re-install device drivers, enable USB debugging mode, and try again.
- If the problem still persists, try changing USB cable or even the USB port.
- Now you need to boot your Moto G5 into Fastboot mode.
- For that type the following command in the command window and press enter:
adb reboot bootloader
- As soon as you press enter key, your Moto G5 will boot into Fastboot mode.
- Check whether Fastboot is functional or not using the following command:
fastboot devices
- Some random numbers along with the ‘List of devices attached’ message will prove that Fastboot is functional.
- Let’s install the TWRP v3.1.1-0 custom recovery now.
- For that type the following command and press enter key:
fastboot flash recovery twrp.img
- As you press enter, the TWRP recovery will be installed on your Moto G5.
- In Fastboot mode, Volume buttons are used for scrolling and the Power button is used for selecting a particular option.
- After successfully installing the TWRP v3.1.1-0 recovery, on your phone (which is still in Fastboot mode) go to the Recovery mode option by pressing the volume down button.
- And then press the Power button to select the Recovery mode option.
- As soon as you press the Power key, your phone will automatically boot into the installed latest TWRP v3.1.1-0 custom recovery.
- Finally! The latest TWRP v3.1.1-0 custom recovery is successfully installed on your Moto G5 smartphone.
- Now you can easily flash custom ROMs, custom kernels, mods, root your phone, remove bloatware, take Nandroid backup, and do much more.
Steps to Root Moto G5
- Download and copy both the Magisk-v11.6 and no-verity-opt-encrypt-5.1 zip files on your phone.
- Do not extract these zip files.
- Then you need to boot your phone into TWRP recovery mode. For that firstly power off your Moto G5 completely until it vibrates.
- Then press and hold Volume down key + Power button simultaneously until your Moto G5 lands into Fastboot mode.
- Then using the volume and power keys boot into TWRP recovery.
- If TWRP recovery asks for Password, click on the Cancel option present there.
- As you enter the TWRP recovery you’ll be asked to modify the system partitions or not.
- So just swipe to the right side to allow modifications.
- From the main menu of TWRP recovery, select the Wipe option.
- On the next screen swipe right to begin the factory reset process.
- This step will clear the data on your phone memory so back up everything before doing this step.
- After wiping out everything press the back button and again goes to the main menu and select the Reboot option.
- On the next screen, select the Recovery option to reboot into recovery.
- If TWRP asks to install the TWRP app, click on Do not Install option present there.
- Wait until your Moto G5 reboots into TWRP recovery.
- Let’s flash the Magisk-v11.6 zip file which we’ve copied earlier.
- So from the main menu of TWRP recovery, select the Install option.
- Select the Magisk-v11.6 zip file to install.
- On the next screen just swipe right to initiate the flashing process.
- Be patient and wait until the process completes successfully.
- As soon as the process completes, you’ll see a successful message on the screen.
- Now again boot your phone into recovery using the Reboot->Recovery option.
- Similarly, install the no-verity-opt-encrypt-5.1 zip file as you’ve installed the Magisk-v11.6 zip file.
- That’s it! All the flashing process completes here.
- Just click on the Reboot->System option to restart your Moto G5.
- After your phone restarts, go to the Magisk manager app and confirm that your Moto G5 is successfully rooted or not.
- You may also confirm it using the Root checker app from Google Play Store.
- Do not update the Magisk app to version 12 or you will lose the root access.
Conclusion
Finally! This is how you can root and install the latest TWRP v3.1.1-0 custom recovery on your Motorola Moto G5 (Cedric) XT1676 smartphone. Now you can easily flash custom ROMs, custom kernels, mods, remove bloatware, take backups or restore, wipe data, do a factory reset, increase internal memory and do much more on your Moto G5. Do let us know how it is working for you. If you have any doubt, feel free to ask in the comments section below.


